Create Civo Stack Cluster
Overview
This guide walks through creating a Civo Stack cluster with Talos Linux and the CSE installer using the Colony UI. The process takes 40-60 minutes from start to ready.
Learn more about Civo Stack Enterprise →
Prerequisites
Before starting, ensure you have:
- 5 minimum assets (3 control planes + 2 workers for storage)
- Civo Stack credentials (GitLab token, image pull secret, API token, region)
- Network configuration (gateway, DNS, NTP, static IPs)
- Management cluster running
See Prerequisites for details.
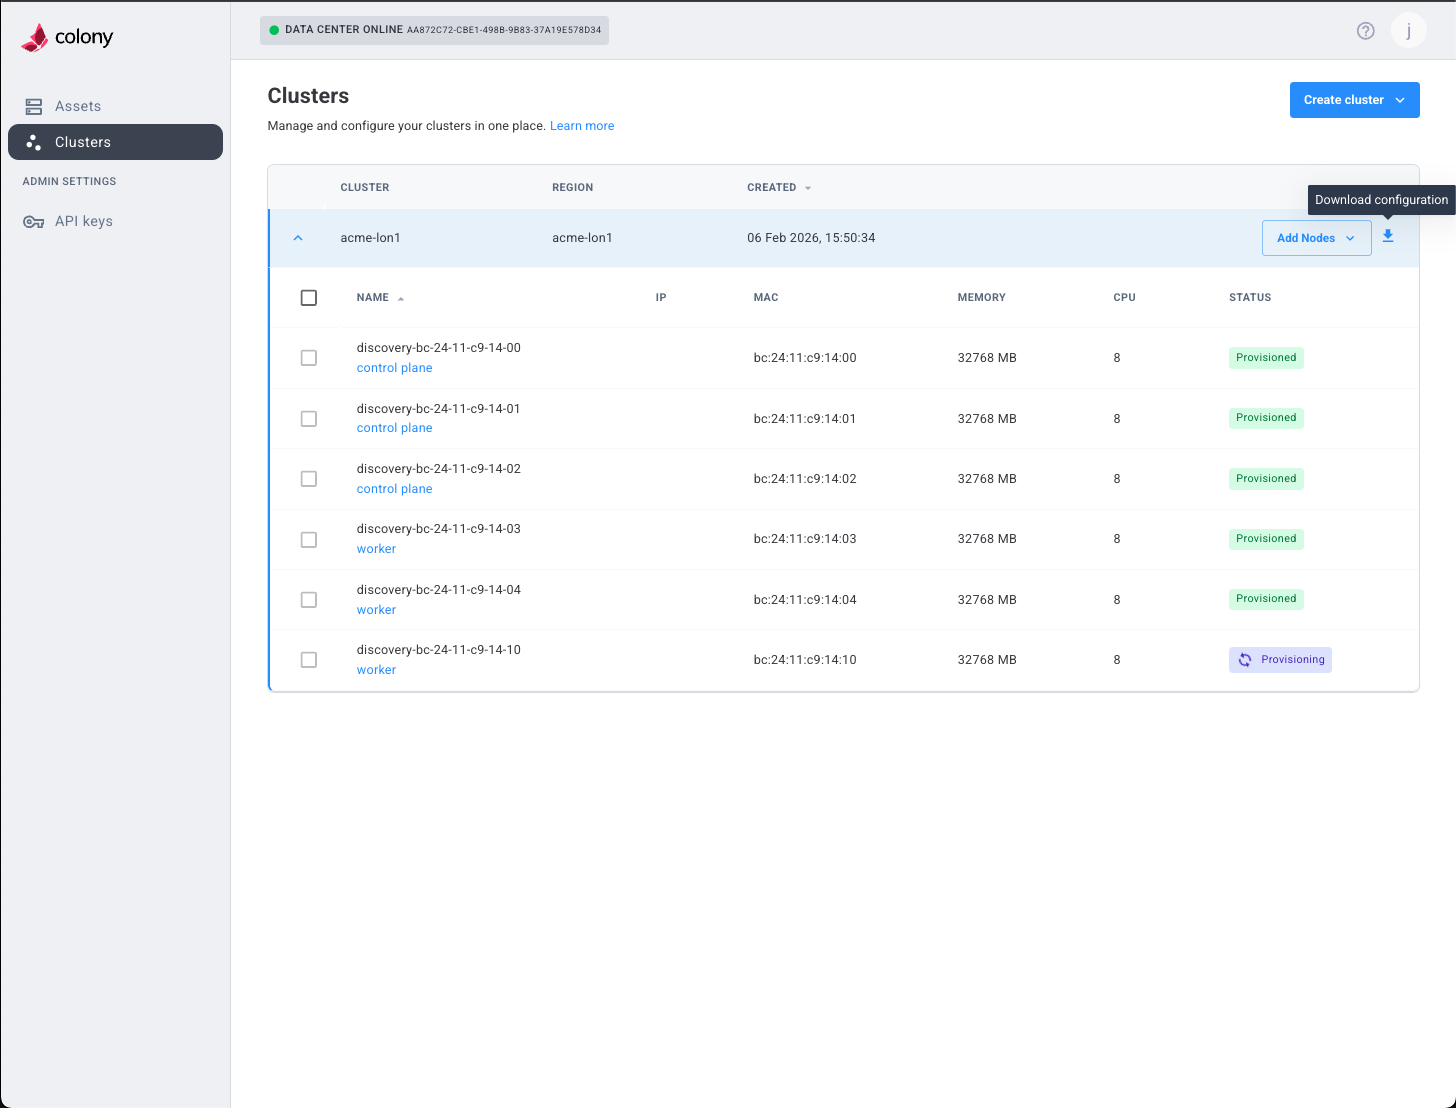
Step 1: Navigate to Cluster Creation
- Log in to colony.konstruct.io
- Select your datacenter from the dashboard
- Click Clusters in the sidebar
- Click Create Cluster
Step 2: Initial Configuration
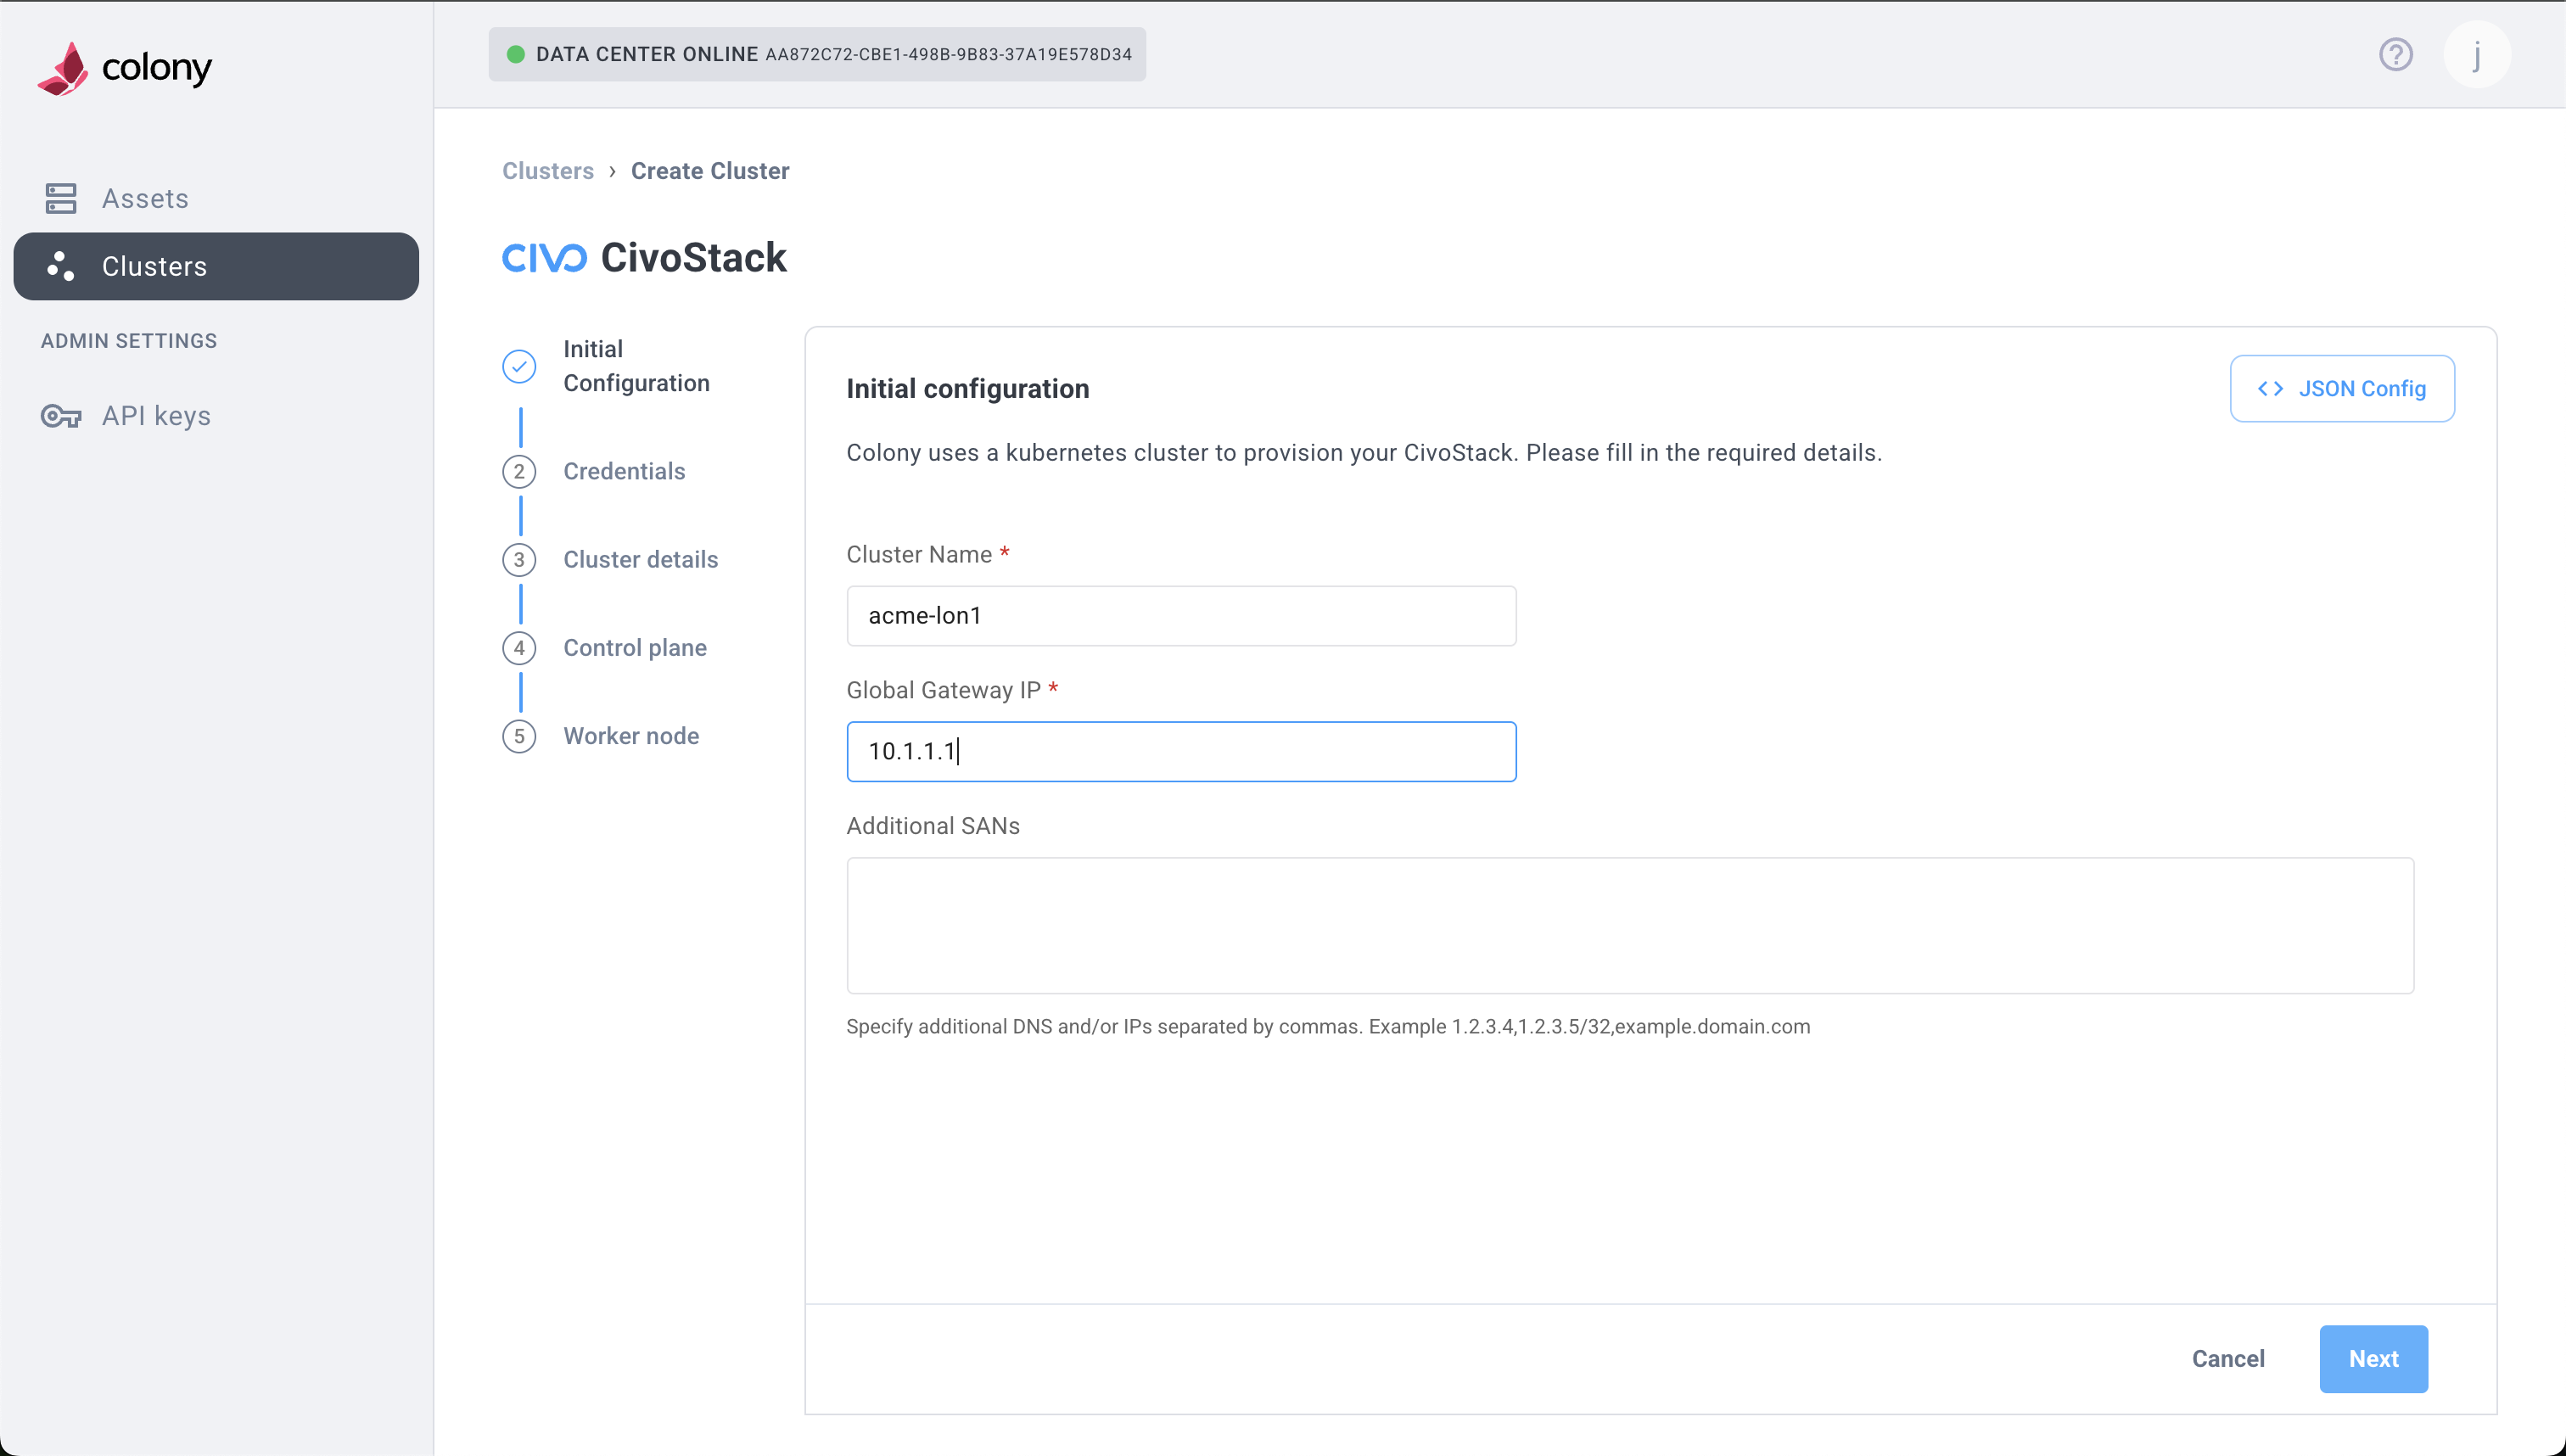
Configure basic cluster settings:
Cluster Name
Enter a descriptive name for your cluster:
production-cluster-01
Use lowercase, alphanumeric characters, and hyphens. This name appears in the UI and kubeconfig.
Cluster Type
Select Civo Stack from the dropdown.
This sets the cluster type to civo_stack with flavor talos.
Gateway IP
Enter your network gateway IP address:
192.168.1.1
This is the default route for all cluster nodes.
Extra SANs (Optional)
Add additional Subject Alternative Names for the API server certificate:
cluster.example.com
192.168.1.100
Comma-separated list. Leave empty if using only the default API server IP.
Click Next to continue.
Step 3: Configure Control Plane
Select Assets
- Click Add Control Plane Node
- From the dropdown, select an available asset
- Repeat for additional control planes (3 recommended for HA)
For high availability, use 3 or 5 control plane nodes. Odd numbers avoid split-brain scenarios.
Assign Static IPs
For each control plane node, enter:
- IP Address: Static IP for this node (e.g.,
192.168.1.101) - Subnet: Network prefix (e.g.,
24for /24 or 255.255.255.0)
Network Configuration
- DNS Servers: Comma-separated IPs (e.g.,
8.8.8.8,8.8.4.4) - NTP Servers: Time sync servers (e.g.,
time.cloudflare.comor0.pool.ntp.org,1.pool.ntp.org)
Storage Configuration
Disk Device: Device path for etcd and Kubernetes data:
/dev/sda
Common values:
/dev/sda- First SATA/SCSI disk/dev/nvme0n1- First NVMe disk/dev/vda- First virtio disk (VMs)
This disk will be wiped during provisioning. Ensure it's the correct device and contains no critical data.
Advanced Configuration (Optional)
For advanced storage and networking options, click the ... (more options) button on each node:
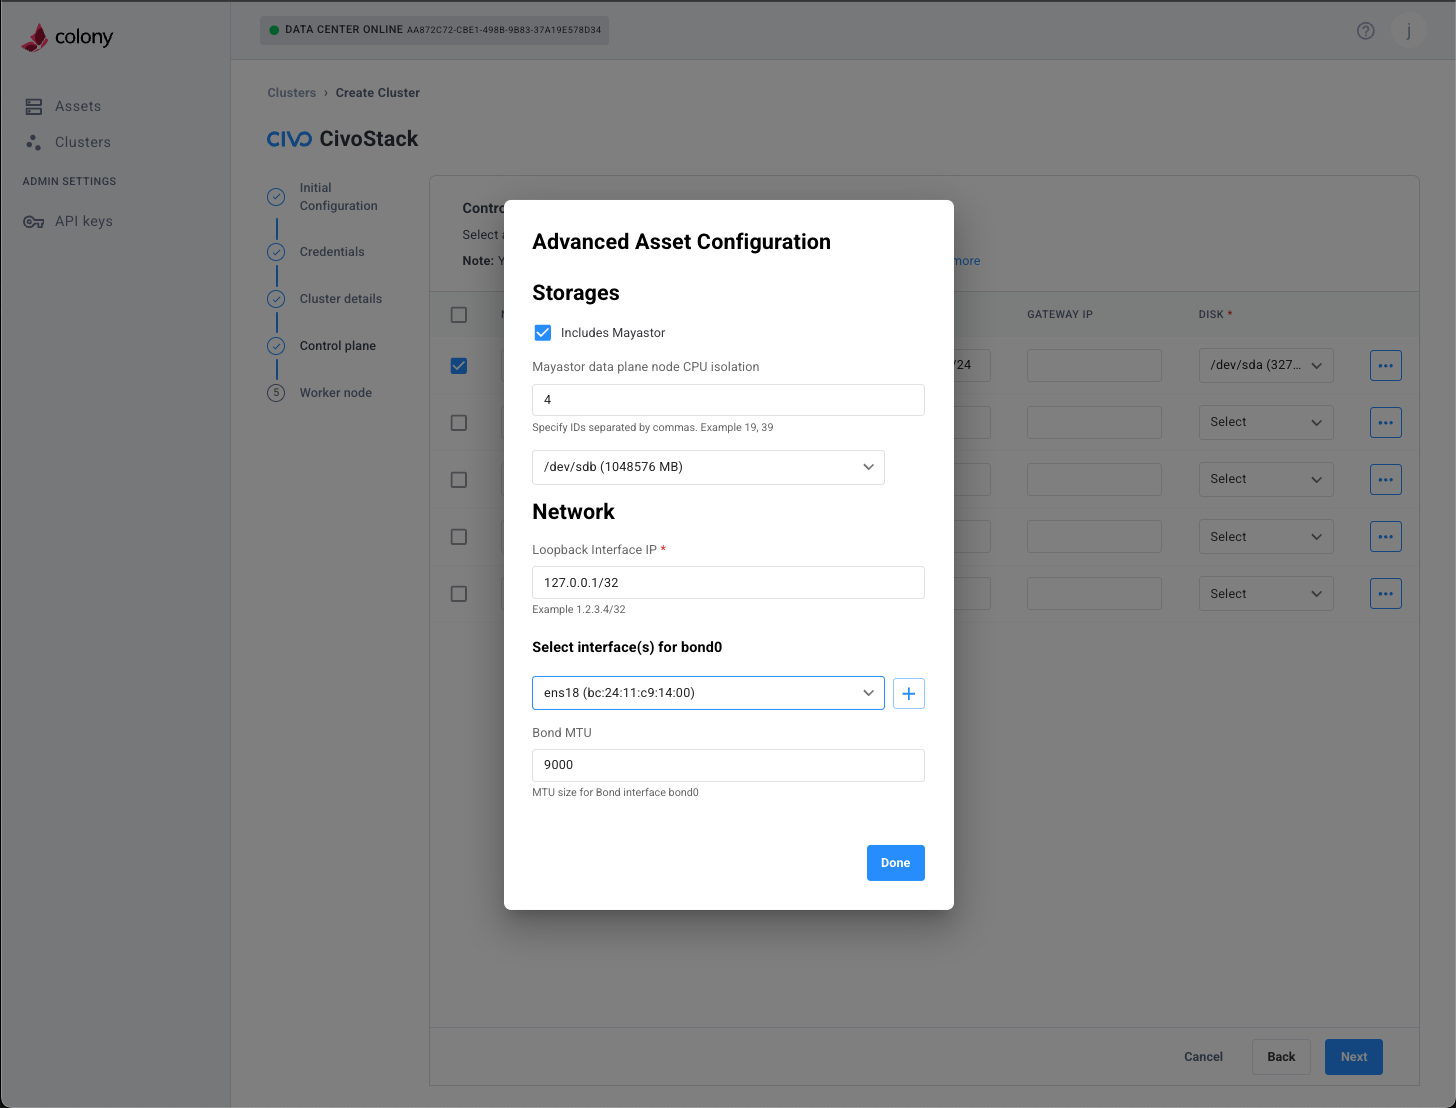
Advanced options include:
- Mayastor Pool Disks: Storage backend for distributed volumes
- CEPH Pool Disks: Alternative distributed storage option
- Wasabi Backup: Object storage configuration for backups
- Network Bonding: Link aggregation for redundancy (bond0)
- Loopback Interface: Custom loopback IP configuration
Most deployments don't need advanced configuration. Use defaults unless you have specific storage or networking requirements.
Click Next to continue.
Step 4: Configure Workers
Worker configuration mirrors control plane setup:
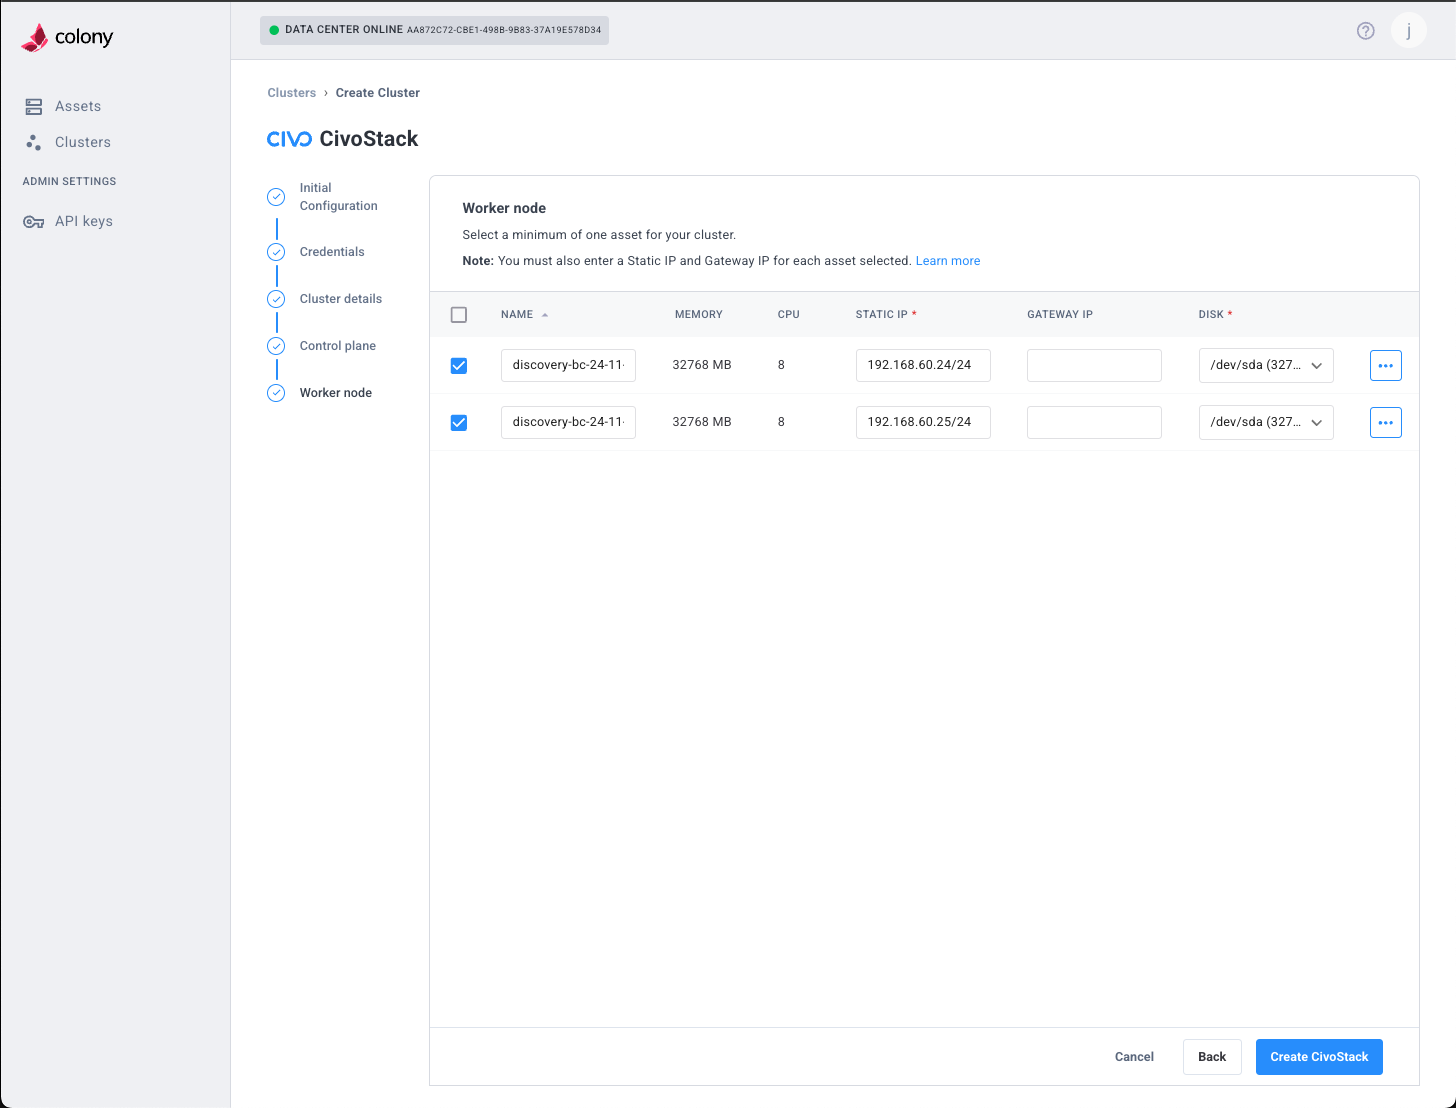
Select Assets
- Click Add Worker Node
- Select available assets from dropdown
- Add multiple workers for workload distribution
Assign Static IPs
For each worker, enter:
- IP Address: Static IP (e.g.,
192.168.1.201) - Subnet: Network prefix (e.g.,
24)
Network & Storage
- DNS Servers: Same as control plane
- NTP Servers: Same as control plane
- Disk Device: Storage device path (e.g.,
/dev/sda)
Workers typically need more CPU and RAM than control planes for running application workloads. Plan resource allocation accordingly.
Click Next to continue.
Step 5: Civo Stack Credentials
Enter your Civo Stack credentials obtained from your account manager:
Region
Your datacenter region identifier:
PHX1
Examples: PHX1, NYC3, LON1. Contact your account manager if unsure.
GitLab Token
Personal access token for Civo Stack GitLab repositories:
glpat-xxxxxxxxxxxxxxxxxxxx
Required permissions: read_repository, read_registry.
Image Pull Secret
Base64-encoded Docker configuration JSON for pulling CSE images:
eyJhdXRocyI6eyJnY3IuaW8iOnsidXNlcm5hbWUiOiJfanNvbl9rZXki...
This is the full base64-encoded string, not the raw JSON.
Civo API Token
Authentication token for Civo services:
xxxxxxxxxxxxxxxxxxxxxxxxxxxxxxxxxxxx
CSE Installer Image (Optional)
Leave default unless instructed by your account manager:
ghcr.io/civo/cse-installer:latest
The installer auto-selects compatible component versions.
Need credentials? Contact your Civo account manager for access to GitLab repositories and container registries. These credentials are required for provisioning Civo Stack clusters.
Click Next to continue.
Step 6: Review and Create
Review your configuration:
- Cluster Name: Verify spelling and naming convention
- Control Planes: Count and IP assignments
- Workers: Count and IP assignments
- Network: Gateway, DNS, NTP settings
- Credentials: Region and tokens (partially masked)
If everything looks correct, click Create Civo Stack.
Provisioning Timeline
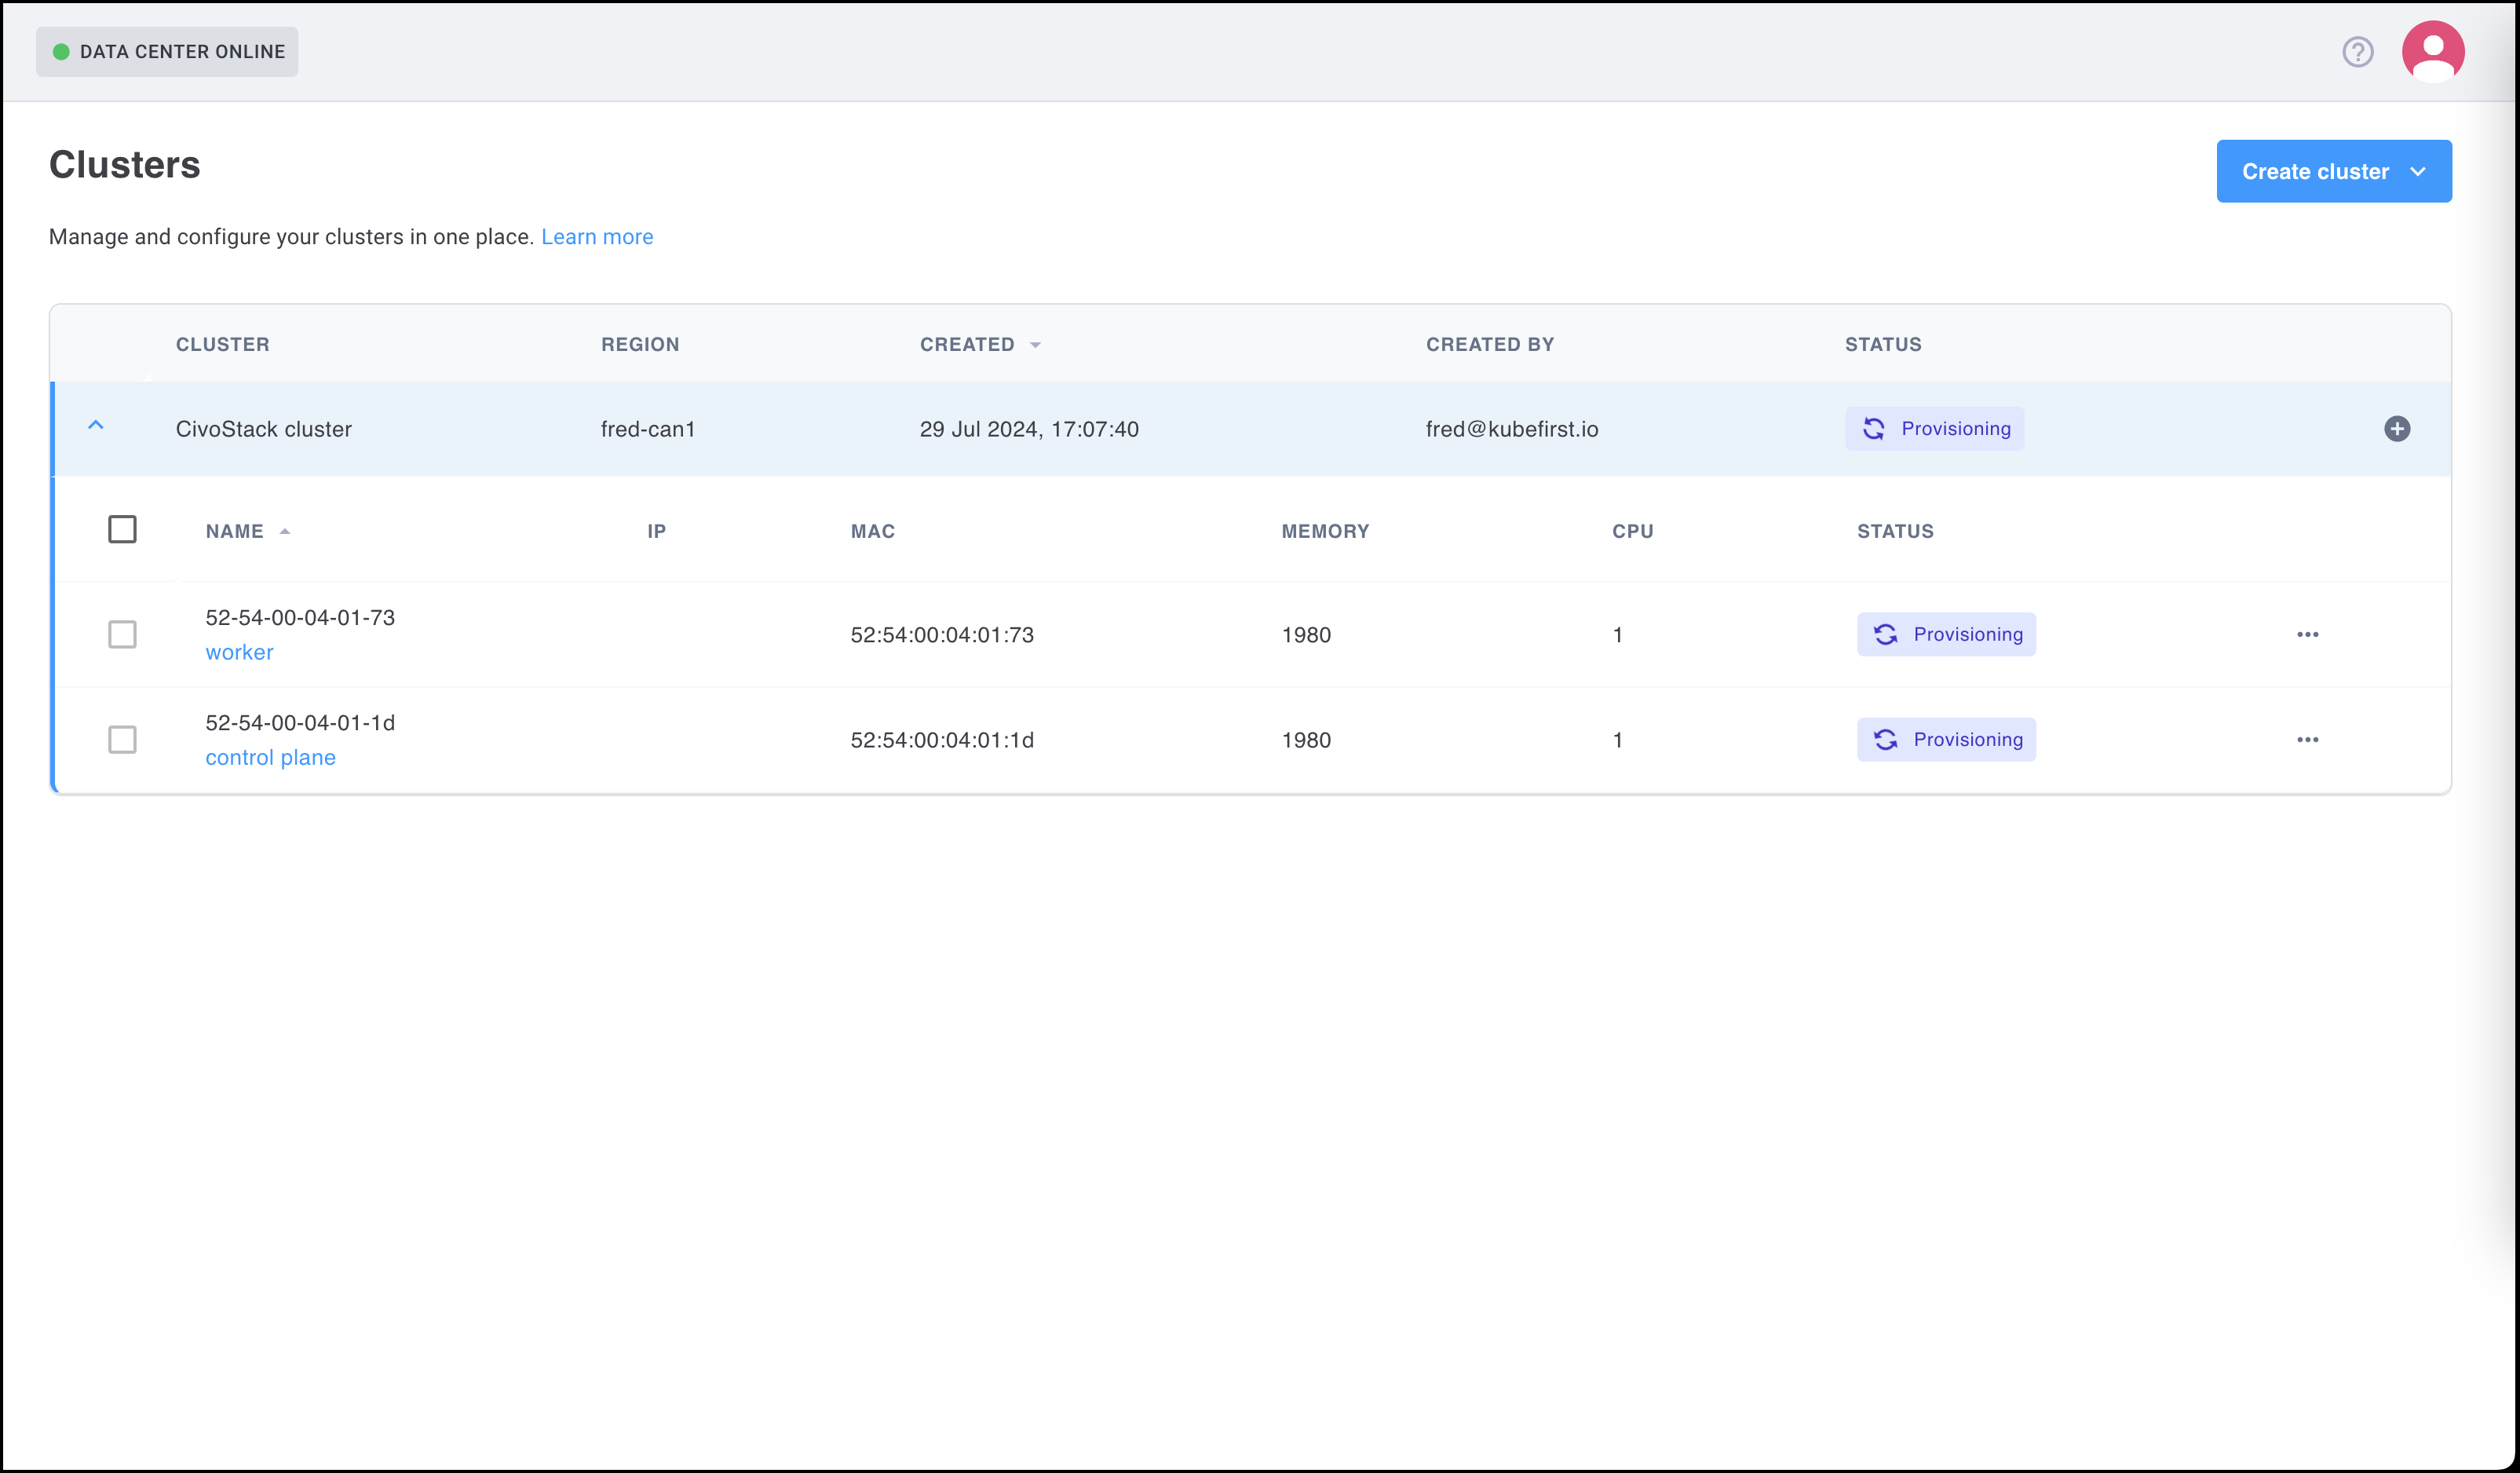
Your cluster will progress through these stages:
| Stage | Duration | Description |
|---|---|---|
| PXE Boot | 2-3 min | Assets network boot and download Talos installer |
| OS Install | 5-7 min | Talos Linux written to disk, machines reboot |
| Config Apply | 2-3 min | Talos machine configs applied via API |
| Bootstrap | 3-5 min | First control plane initializes Kubernetes |
| Node Join | 2-4 min | Additional nodes join cluster |
| CSE Installer | 5-10 min | Platform components deployed (autopilot, monitoring) |
| Ready | 1-2 min | Cluster healthy, kubeconfig available |
Total: Approximately 40-60 minutes depending on hardware and network speed.
Monitor Progress
Watch provisioning in real-time:
Colony UI:
- Cluster status shows current stage
- Progress bar indicates completion percentage
- Logs available in cluster details
kubectl (from management cluster):
# Watch colony-agent logs
kubectl logs -n colony -l app=colony-agent -f

# Check Tinkerbell workflows
kubectl get workflows -A

# View workflow details
kubectl describe workflow -n tink-system <workflow-name>
Verification
Download kubeconfig
Once provisioning completes:
- Click Download Kubeconfig in the cluster details
- Save to
~/.kube/civo-stack-config - Export for kubectl:
export KUBECONFIG=~/.kube/civo-stack-config
Verify Cluster Health
Check all nodes are Ready:
kubectl get nodes
Expected output:
NAME                    STATUS   ROLES           AGE   VERSION
control-plane-01        Ready    control-plane   10m   v1.29.0
control-plane-02        Ready    control-plane   9m    v1.29.0
worker-01               Ready    <none>          8m    v1.29.0
worker-02               Ready    <none>          8m    v1.29.0
Check System Pods
Verify core components are running:
kubectl get pods -A
Look for:
kube-system: CoreDNS, kube-proxy, Flannelcse-installer: CSE installer job (Completed)civo-system: Autopilot, monitoring agents (if applicable)
Verify CSE Components
Check that CSE installed successfully:
# Check autopilot ConfigMap
kubectl get configmap -n kube-system autopilot-config

# Check gcr-mirror-pull secrets
kubectl get secrets -A | grep gcr-mirror-pull

# Verify CSE installer job completed
kubectl get jobs -A | grep cse-installer
All should show successful status.
Test Cluster Connectivity
Deploy a test workload:
kubectl run nginx --image=nginx --port=80
kubectl expose pod nginx --port=80 --type=NodePort
kubectl get svc nginx
Access the service using any node IP and the NodePort to confirm networking works.
Talos Management (Optional)
Download talosconfig
In addition to kubeconfig, you can manage Talos nodes directly:
- In Colony UI, click Download Talosconfig
- Save to
~/.talos/config
Talosctl Commands
Interact with Talos API:
# Check Talos version
talosctl version --nodes 192.168.1.101

# View node services
talosctl services --nodes 192.168.1.101

# Get node logs
talosctl logs --nodes 192.168.1.101 kubelet

# Reboot a node
talosctl reboot --nodes 192.168.1.201
Talos has no SSH access. All management is via API using talosctl. This ensures immutability and security.
Troubleshooting
Provisioning Stuck at PXE Boot
Symptoms: Assets don't boot from network, provisioning times out.
Solutions:
- Verify DHCP server is running and configured with PXE settings
- Check TFTP server is reachable from assets:
tftp <load-balancer-ip> - Confirm assets have PXE boot enabled in BIOS/UEFI
- Ensure network interface connected to correct VLAN
- Check Tinkerbell smee logs:
kubectl logs -n tinkerbell -l app=smee
CSE Installer Fails
Symptoms: CSE installer job shows Error or CrashLoopBackOff.
Solutions:
- Verify credentials are correct (GitLab token, image pull secret, API token)
- Check image pull secret format (must be base64-encoded Docker configuration JSON)
- Ensure cluster has internet access to pull images from gcr.io or private registry
- Review installer logs:
kubectl logs -n <namespace> -l job-name=cse-installer - Confirm region identifier matches your datacenter
Nodes Not Joining
Symptoms: Some nodes show in Talos but not kubectl get nodes.
Solutions:
- Check node status in Talos:
talosctl get members --nodes <control-plane-ip> - Verify static IPs are correct and pingable
- Ensure firewall allows port 6443 (API server) and 50000-50001 (Talos API)
- Check kubelet logs:
talosctl logs --nodes <node-ip> kubelet - Confirm DNS is working:
talosctl logs --nodes <node-ip> containerd | grep dns
API Server Unreachable
Symptoms: kubectl commands timeout or refuse connection.
Solutions:
- Verify kubeconfig uses correct IP and port
- Check control plane nodes are healthy:
talosctl services --nodes <control-plane-ip> - Ensure port 6443 is not blocked by firewall
- Confirm API server is running:
talosctl logs --nodes <control-plane-ip> kube-apiserver - Try accessing from management cluster first to rule out client networking issues
CSE Components Missing
Symptoms: Autopilot ConfigMap or gcr-mirror-pull secrets not found.
Solutions:
- Check CSE installer job succeeded:
kubectl get jobs -A | grep cse-installer - Review installer logs for errors:
kubectl logs -n <namespace> -l job-name=cse-installer - Verify image pull secret is valid and not expired
- Re-run installer manually if needed (contact Civo support)
What's Next
Your Civo Stack cluster is ready! Here's what you can do:
Add More Nodes
Scale your cluster by adding workers or control planes:
Deploy Applications
Use kubectl or Helm to deploy workloads:
# Example: Deploy a simple app
kubectl create deployment hello --image=gcr.io/google-samples/hello-app:1.0
kubectl expose deployment hello --port=8080 --type=LoadBalancer
Configure Storage
Set up persistent storage for stateful apps:
# Check available storage classes
kubectl get storageclass

# Create a PersistentVolumeClaim
kubectl apply -f - <<EOF
apiVersion: v1
kind: PersistentVolumeClaim
metadata:
  name: my-pvc
spec:
  accessModes:
    - ReadWriteOnce
  resources:
    requests:
      storage: 10Gi
EOF
Enable Monitoring
Access built-in observability (if CSE installed):
- Prometheus metrics
- Grafana dashboards
- Log aggregation
Check your Civo account for access URLs.
Explore Autopilot
Review autopilot configuration:
kubectl get configmap -n kube-system autopilot-config -o yaml
Autopilot manages:
- Automatic updates
- Self-healing
- Policy enforcement
Learn More
Need help? Join our Slack community for support!