Add Nodes to Cluster
Overview
Colony allows you to add nodes to existing clusters to scale capacity or improve high availability. The process varies by cluster type.
Prerequisites
Before adding nodes:
- Existing cluster is healthy and operational
- Additional assets available (status: "available" or "provisioned" for K3s)
- Assets meet minimum requirements for cluster type
- Network configuration ready (static IPs, DNS, etc.)
Add Nodes via UI
Step 1: Navigate to Cluster
- Log in to colony.konstruct.io
- Click Clusters in sidebar
- Select your cluster
- Click Add Nodes or Scale Cluster
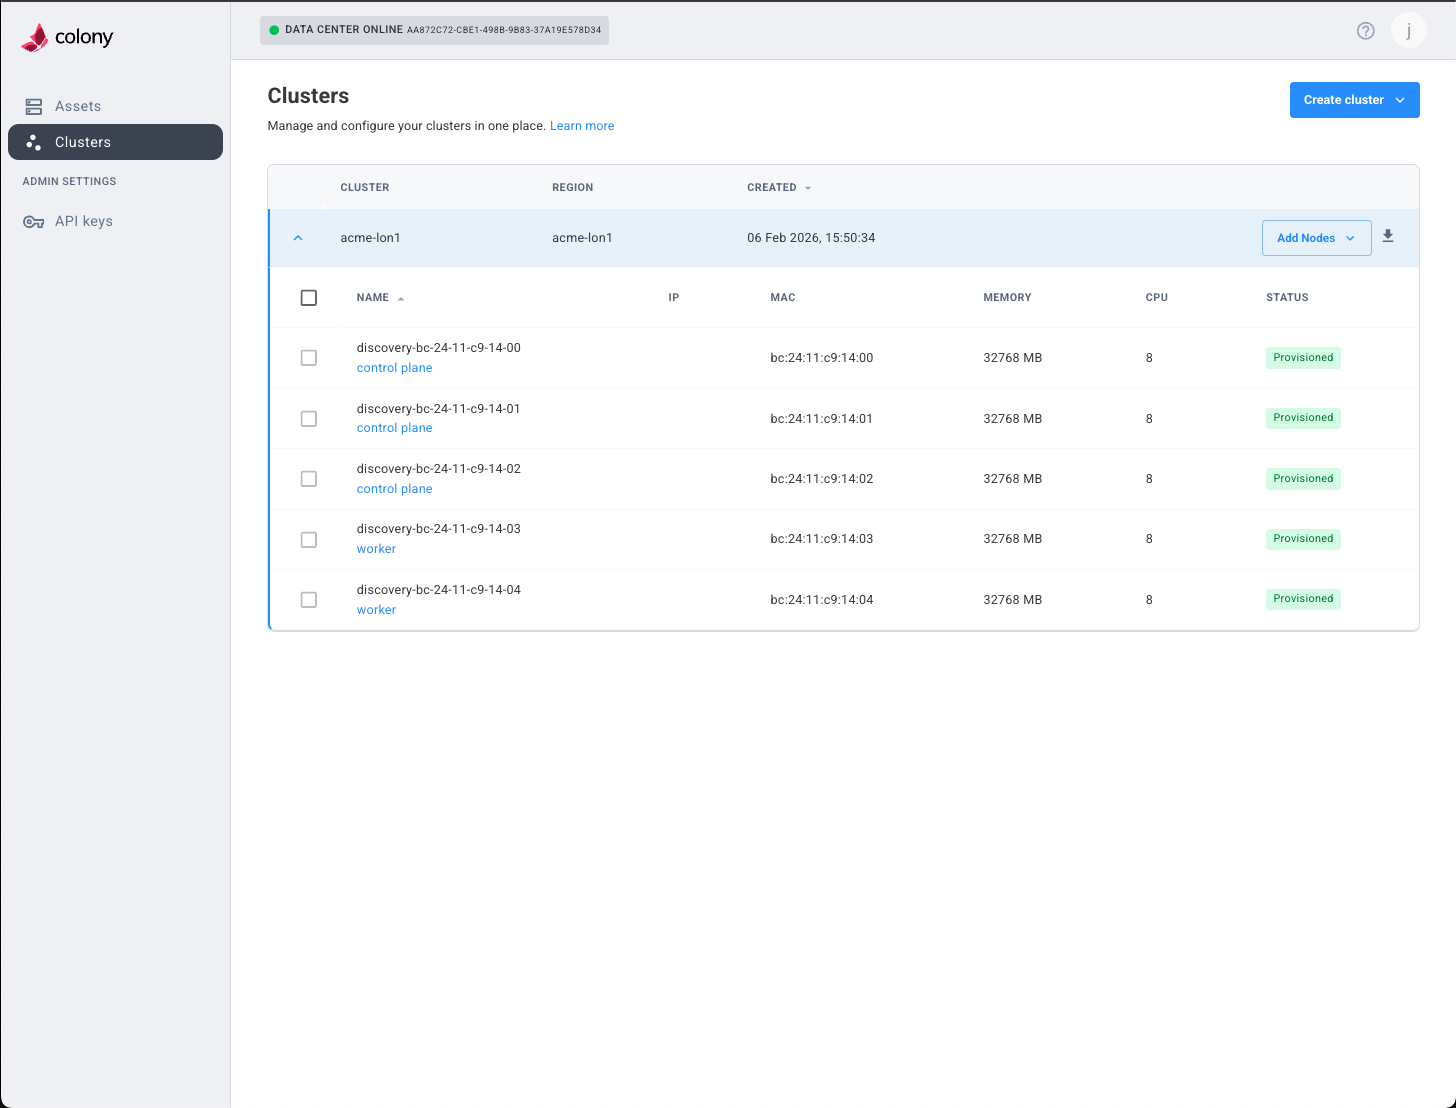
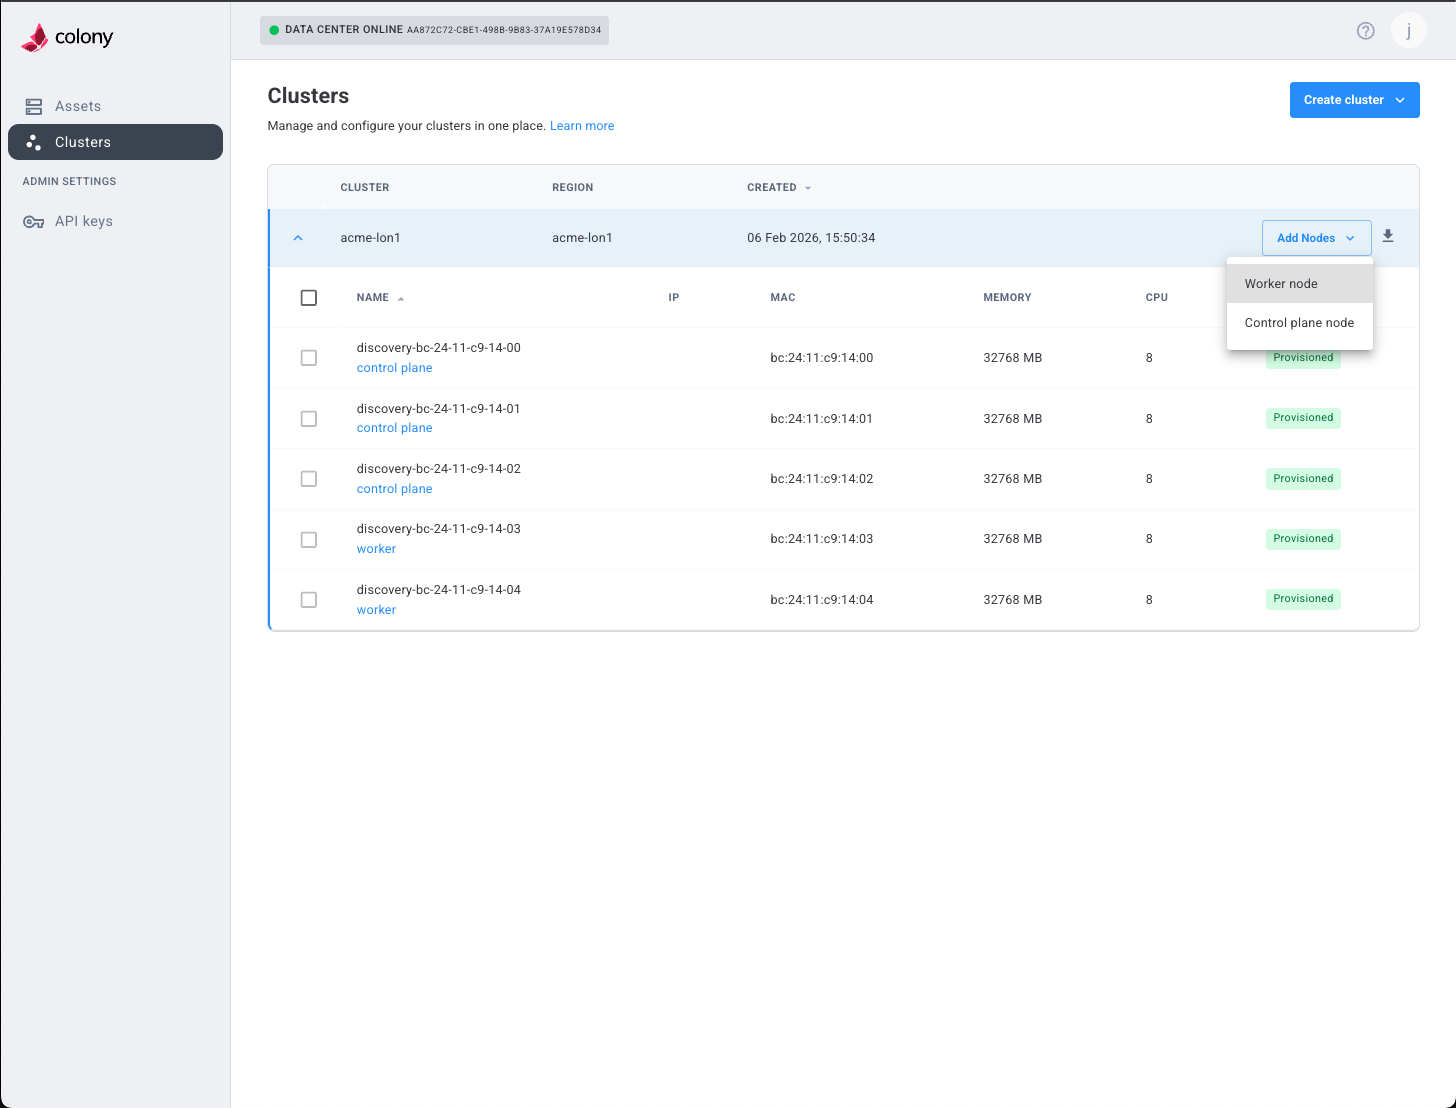
Step 2: Choose Node Type
Select what to add:
- Control Plane Node: Adds to etcd quorum and API server
- Worker Node: Adds capacity for workloads
For high availability, aim for 3 or 5 control plane nodes (odd numbers). Add workers as needed for workload capacity.
Step 3: Configure New Nodes
Similar to cluster creation:
- Select available assets
- Assign static IPs
- Configure network settings (DNS, NTP)
- Specify disk device
For K3s clusters, also provide SSH public key.
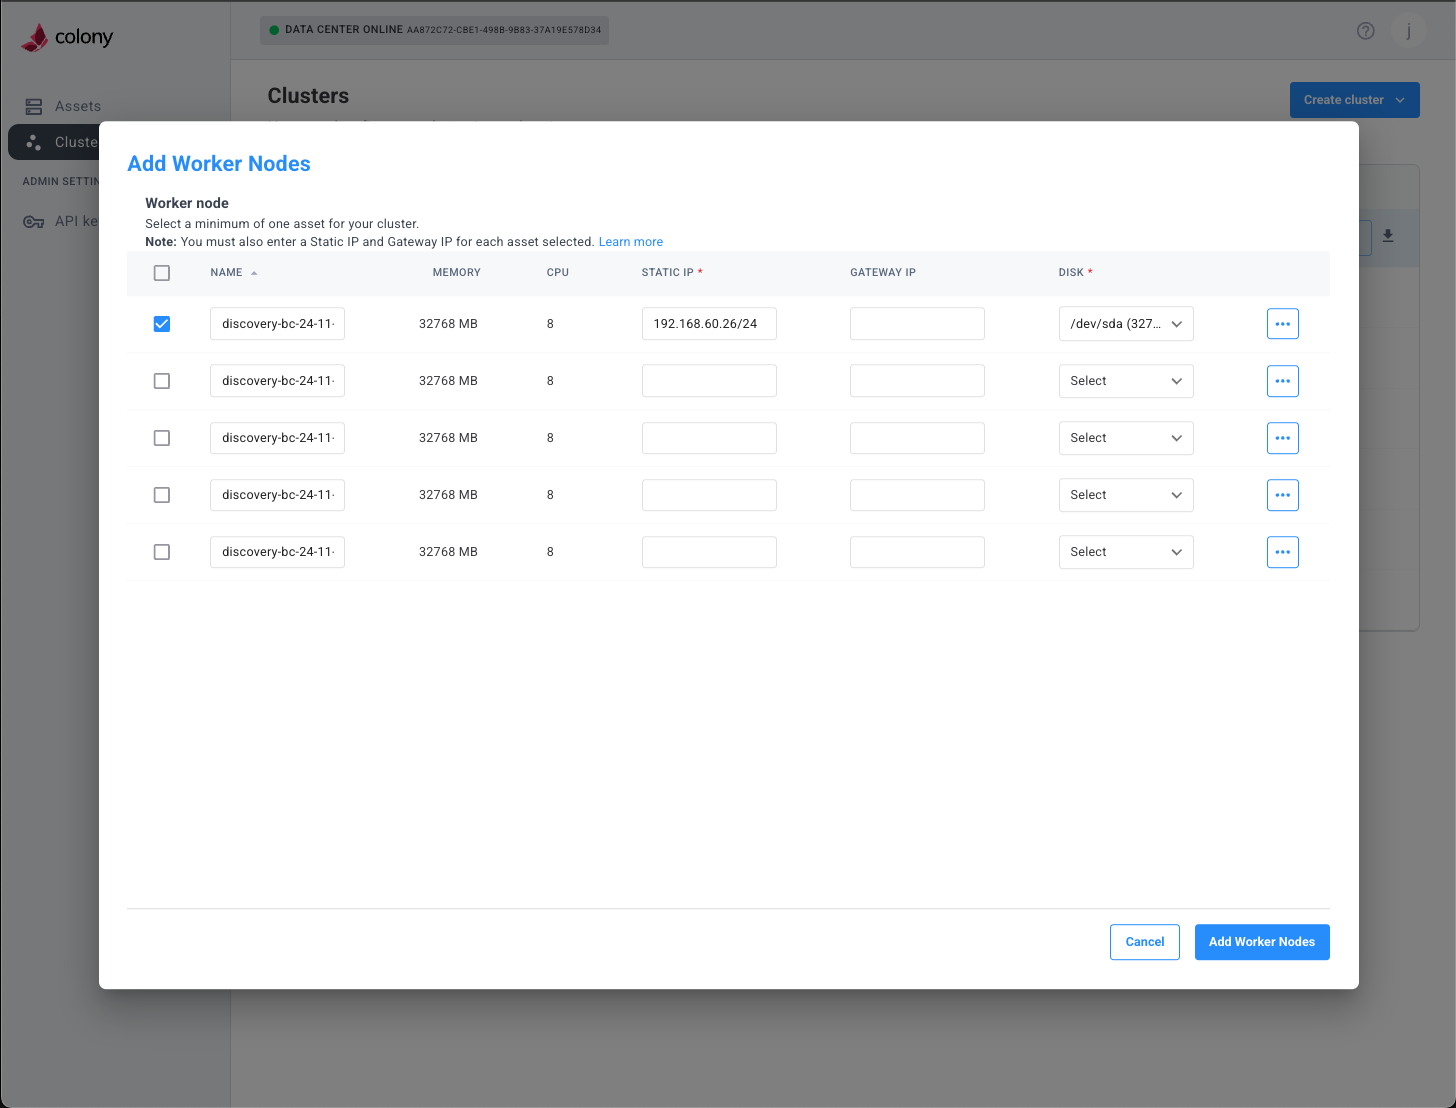
Step 4: Review and Add
Review configuration and click Add Nodes.
Cluster-Specific Notes
Civo Stack (Talos)
- Nodes PXE boot and install Talos automatically
- Join cluster using existing machine configurations
- CSE components automatically deploy to new nodes
- Timeline: 15-25 minutes per node
K3s
- Assets must already have Ubuntu 22.04 provisioned
- K3s installed via SSH
- Workers join using token from control plane
- Timeline: 5-10 minutes per node
Talos Linux
- Nodes PXE boot and install Talos automatically
- Join cluster using existing machine configurations
- Remember to install CNI if not already present
- Timeline: 8-15 minutes per node
Verify New Nodes
Check Node Status
# List all nodes
kubectl get nodes

# Watch nodes become Ready
kubectl get nodes -w
New nodes should appear and transition to "Ready" status.
Verify Workload Distribution
# Check pods distributed across nodes
kubectl get pods -A -o wide

# Verify scheduler uses new nodes
kubectl get events --sort-by='.lastTimestamp'
Troubleshooting
Node Won't Join
Symptoms: New node doesn't appear in kubectl get nodes.
Solutions:
- Verify asset provisioning completed successfully
- Check network connectivity to control plane
- Review colony-agent logs
- For K3s: Verify SSH access works
- For Talos: Check talosctl node status
Node Stuck NotReady
Symptoms: Node appears but stays NotReady.
Solutions:
- For Talos Linux: Ensure CNI is installed
- Check kubelet logs:
kubectl logs -n kube-system kubelet-<node> - Verify node can reach API server
- Check for resource constraints (CPU, memory)
Workloads Not Scheduling
Symptoms: Pods don't schedule to new nodes.
Solutions:
- Check node taints:
kubectl describe node <node-name> - Verify node has sufficient resources
- Check pod resource requests match node capacity
- Review scheduler logs
Remove Nodes
To remove nodes from a cluster:
Drain Node
# Gracefully evict pods
kubectl drain <node-name> --ignore-daemonsets --delete-emptydir-data
Delete Node
# Remove from cluster
kubectl delete node <node-name>
Deprovision Asset
Via Colony UI:
- Navigate to Assets
- Select the node's asset
- Click Wipe Disk
- Confirm action
Asset will return to "available" status for reuse.
What's Next
Need help? Join our Slack community for support!