Install & Asset Discovery
Summary
After reviewing the required prerequisites, refer to the details below to install Colony.
Step 1 - Installing Colony
The following installation instructions apply to Colony version v0.2.
Download and extract the Colony CLI:
curl -fsSL https://objectstore.nyc1.civo.com/konstruct-assets/colony/v0.2.4/colony_Linux_x86_64.tar.gz | tar xz
Verify the binary works:
colony version
Move to your PATH:
sudo mv colony /usr/local/bin/
Step 2 - Create Your API Key
- Navigate to
https://colony.konstruct.io/ - Log in with any of the options listed, this step creates your data center (and unique ID for the data center)
- Go to API Keys and select Create New API Key.
Save this information in a safe place, it only displays once.
Step 3 - Run the Colony init
colony init \
  --api-key <from-ui> \
  --data-center-id <from-ui> \
  --load-balancer-interface <asset-management-interface> \
  --load-balancer-ip <ip-address>
export KUBECONFIG=~/.colony/config
Items to Note
<interface>refers to the interface connected tonetwork boot- The IP address should be in the same subnet as the assets being discovered
- This is the address of the
next-server(tftp server). Refer to the following to generate API keys
- This is the address of the
Step 4 - Asset Discovery
Power on your assets to auto-discover. Use ipmitool for power management:
# Check power status
ipmitool -H <ipmi-ip> -I lanplus -U <username> -P <password> power status

# Set PXE boot and power on
ipmitool -H <ipmi-ip> -I lanplus -U <username> -P <password> chassis bootdev pxe
ipmitool -H <ipmi-ip> -I lanplus -U <username> -P <password> power on
Assets will PXE boot and automatically appear in the Colony UI.
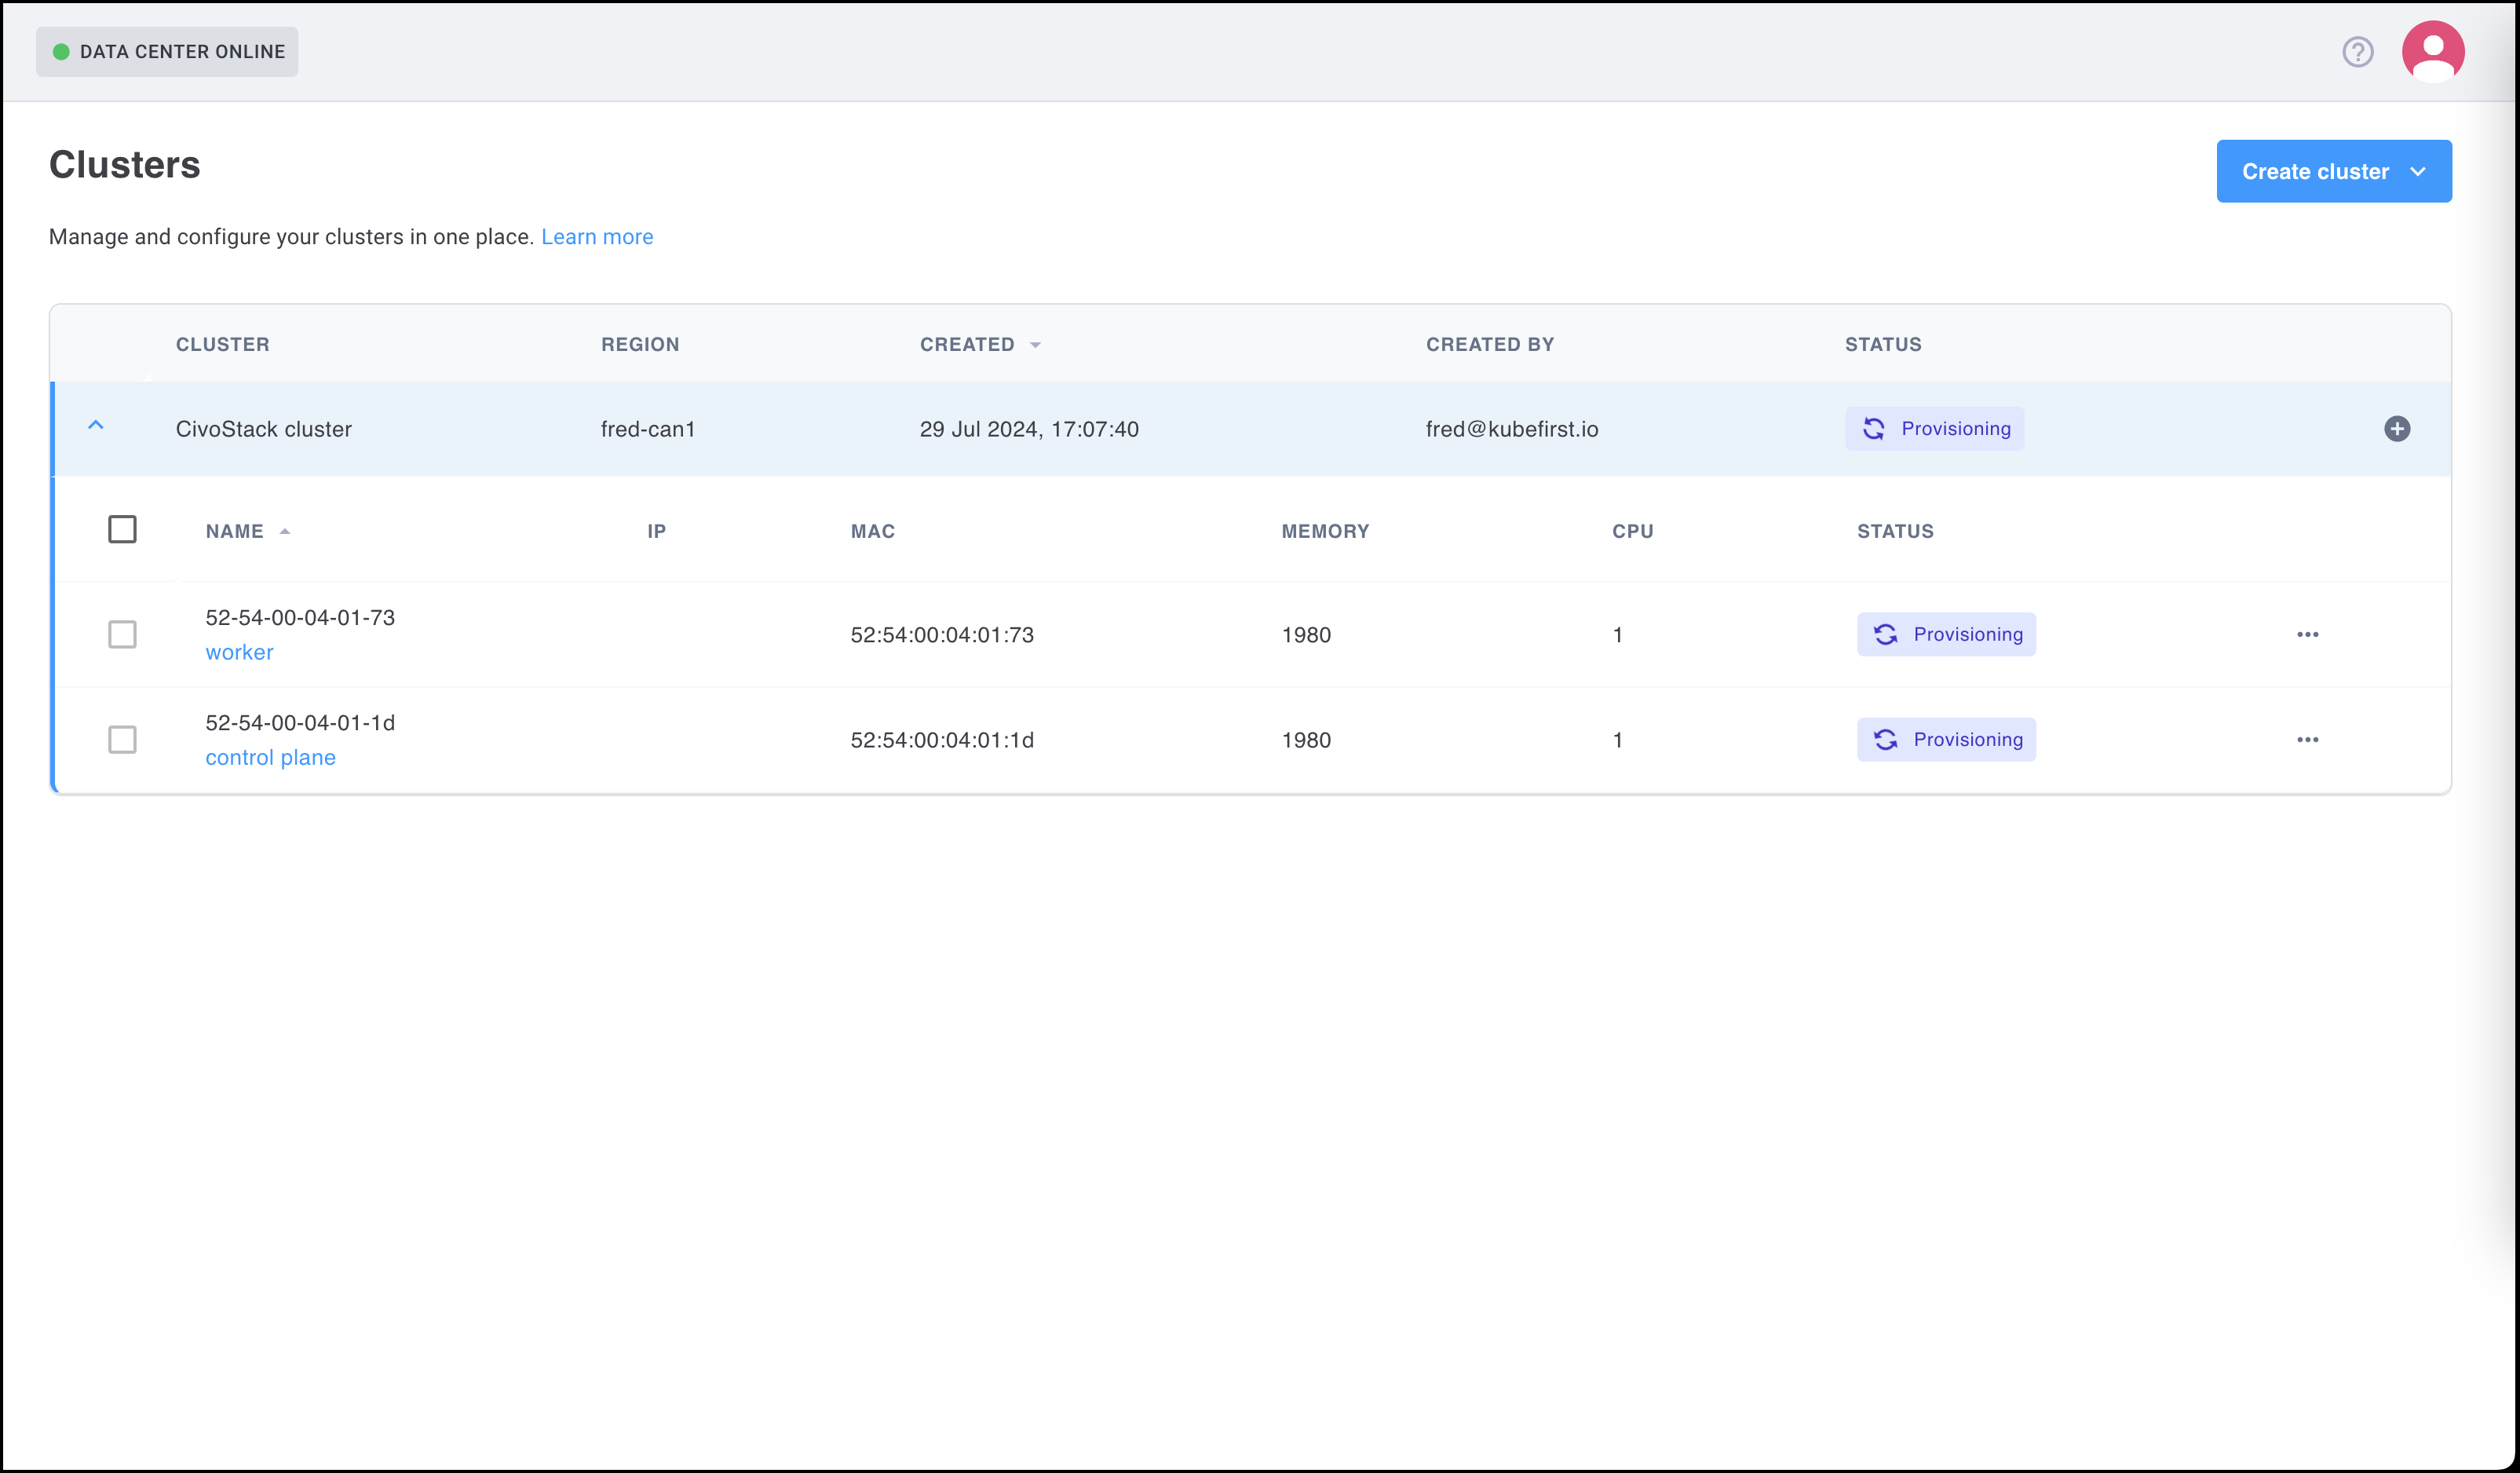
Step 5 - Adding a Cluster
After your Assets are discovered and listed as available you can use them to provision a cluster. You must have a minimum of two Assets to create a cluster (one for the Control plane and one for the Worker node).
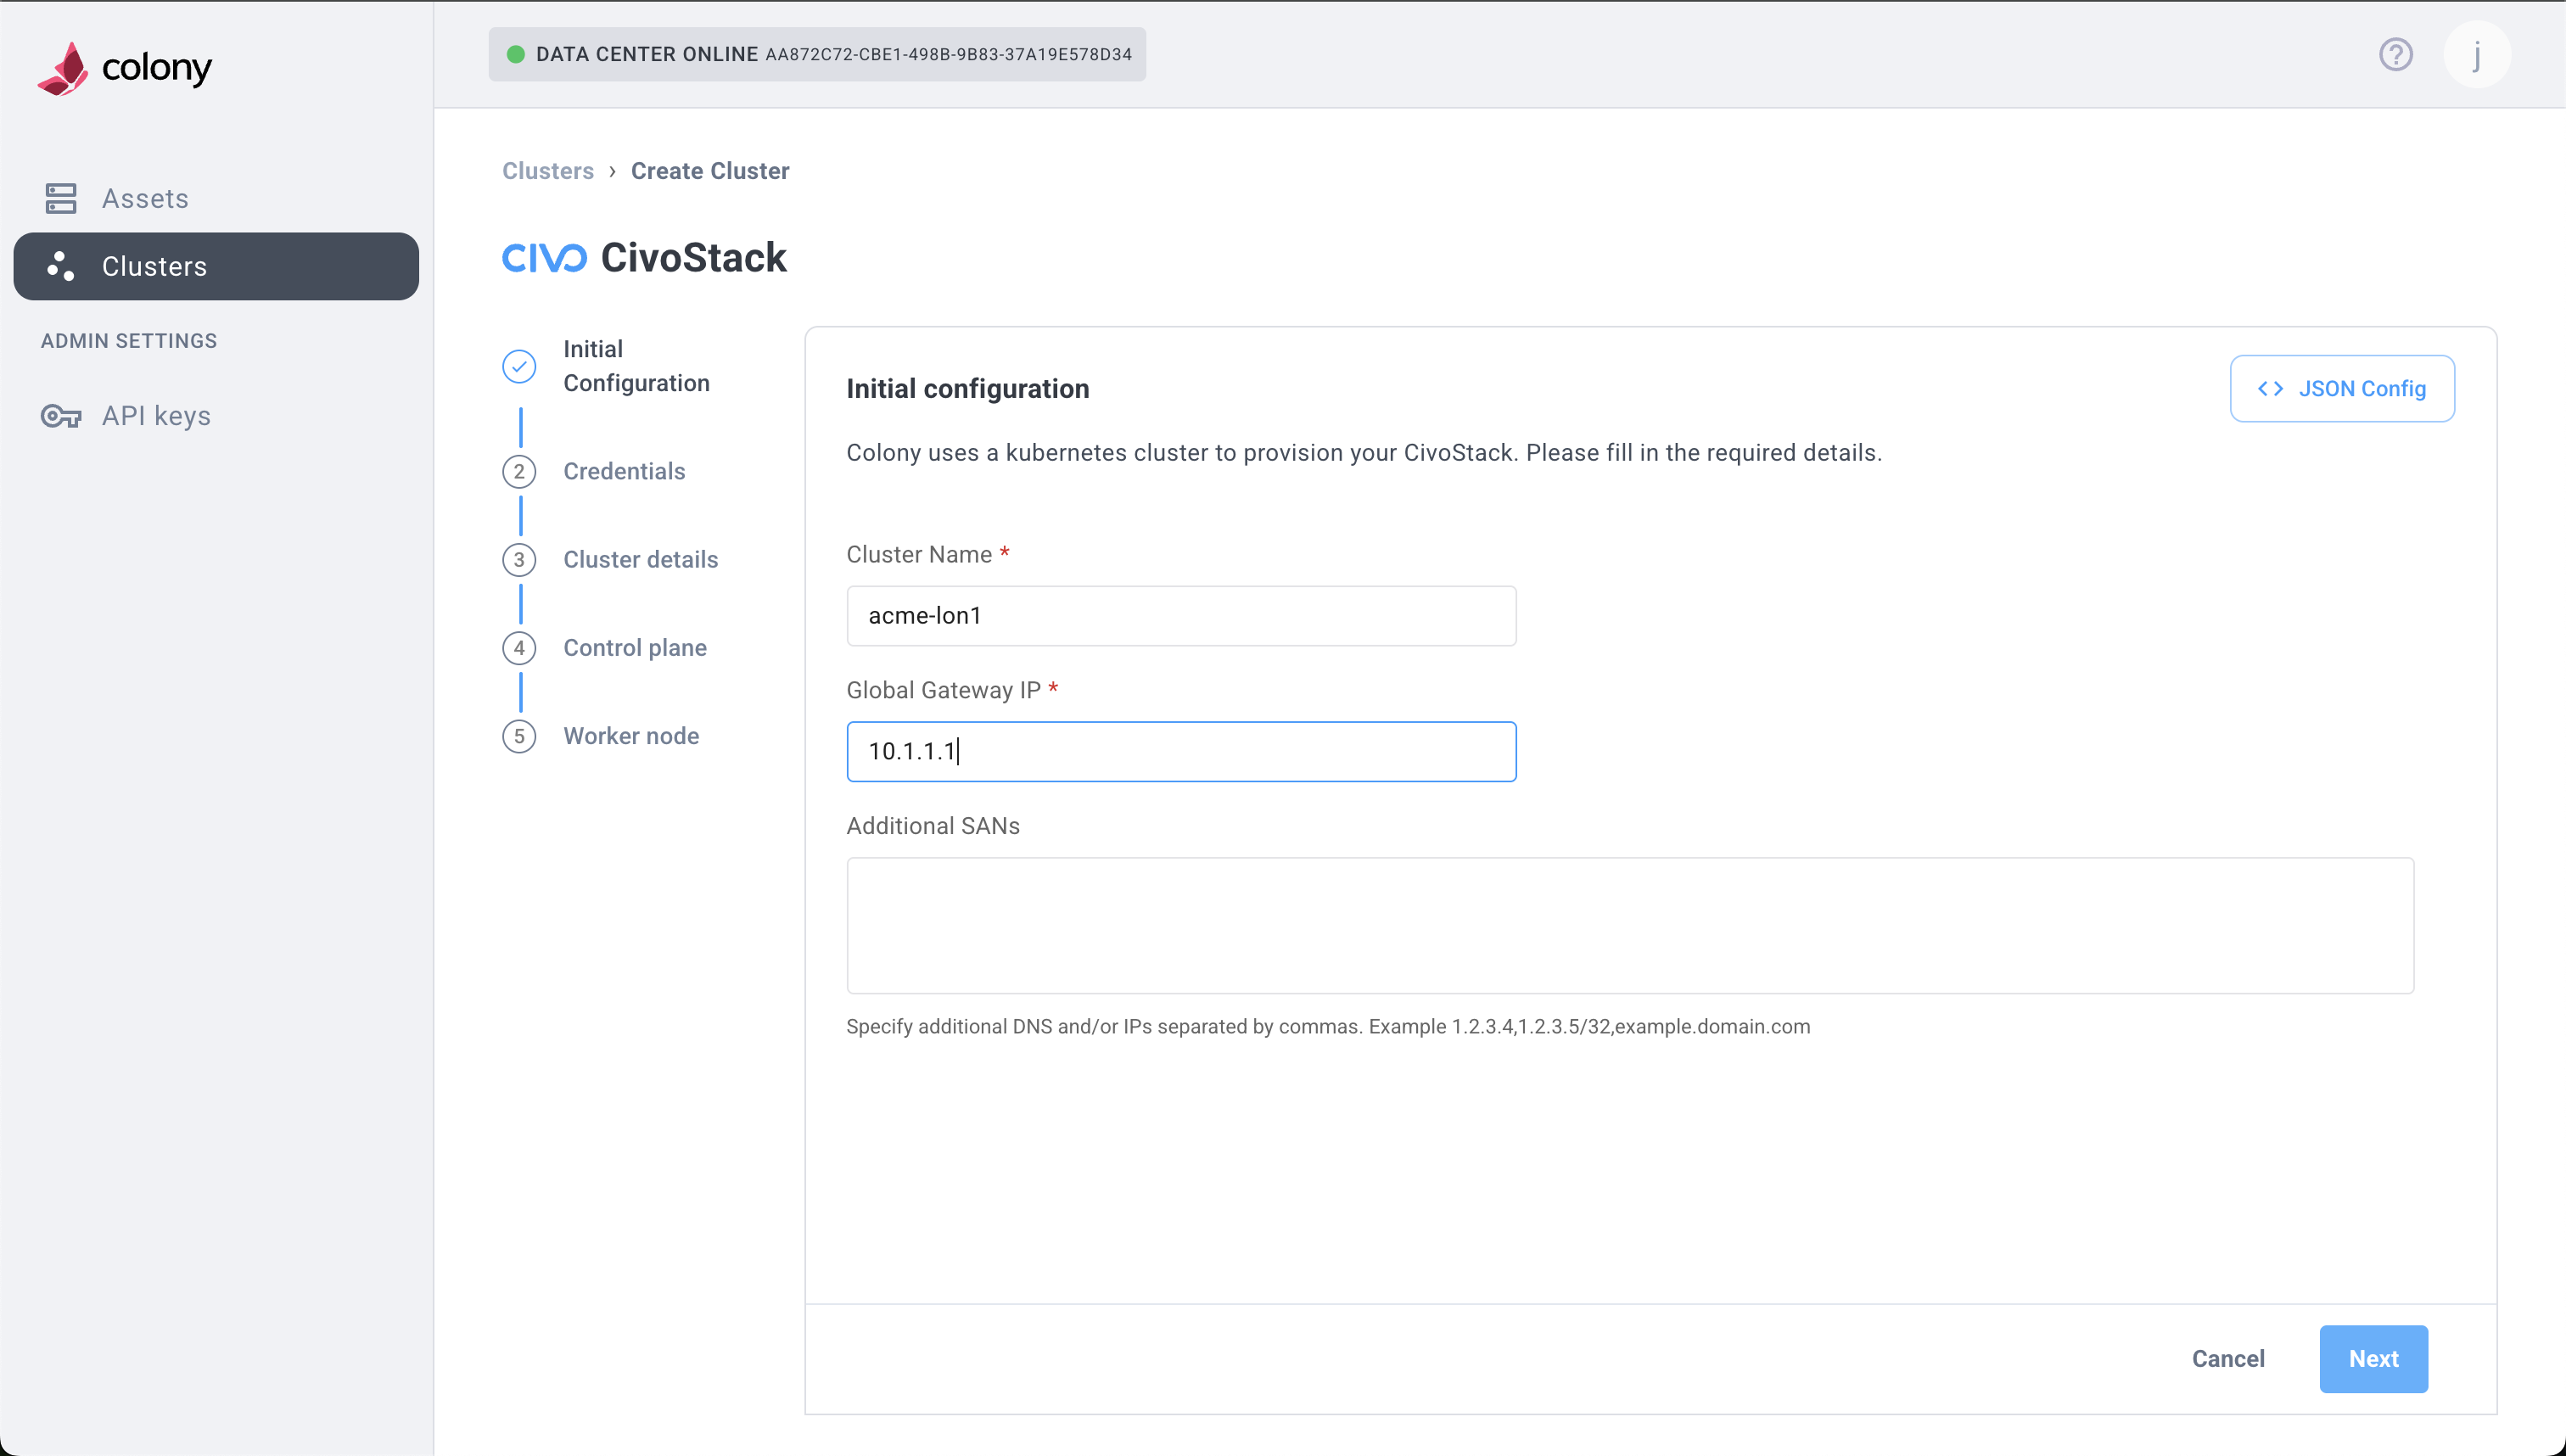
- Select Create Cluster to start this process.
- Complete Cluster details, Control plane details, and Worker node information as desired.
- Select Create CivoStack** to complete this process.